
Step by step tutorial where I will walk you through every step to change (spoof) the MAC address of your wireless (WiFi) adapter using Linux BackTrack or Kali.
I originally included these steps to change your MAC address and enable packet injection in each of my other WiFi hacking tutorials. But it was redundant seeing the same thing so many times, so I’ve decided to create this separate detailed post where I show you how to spoof (fake) your MAC address.
1. Getting Kali or Back Track Linux to use your adapter in packet injection mode. This is necessary, and you cannot do any of these tutorials if your wireless adapter doesn’t use packet injection. Again, I really recommend that you check out the Alfa network cards. They’re great and they work out of the box with Kali and Back Track.
2. The last step is optional. I’ll teach you how to spoof the MAC address. Attackers regularly run MAC spoofing before an attack, so it’s helpful to know how this works and what to look out for.
Before MAC Spoofing, enabling Packet Injection
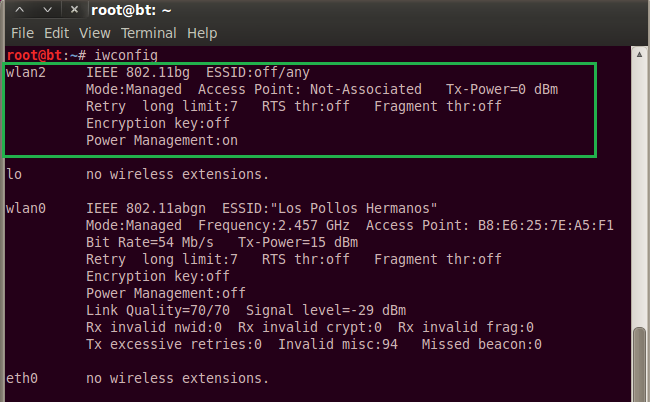
First things first, plug in your wireless network adapter. Then open a terminal Window and run:
iwconfigNow you need to locate your USB wireless adapter from the list of devices iwconfig prints back for you. Mine is named wlan2, but remember, yours may be named differently, and you will need to use the name of your USB adapter in place of mine. WlanO is my internal WiFi card.
Now, put the adapter into packet capture mode by running:
airmon-ng start wlan2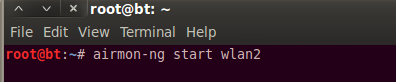
(Don’t forget to substitute wlan2 for the name of your wireless adapter!)
The airmon command creates a virtual WiFi interface on top of the physical one. We will be doing our WiFi hack (all the sniffing, spoofing, and injecting) through the virtual interface. Make note of the monitor mode enabled on section. In my case, Back Track named the packet-injecting interface mon0.

We are now ready to run our wireless security audits. We can choose from a huge number of wireless cracking utilities that are available to us in Kali or Back Track. We’ll run these tools while specifying the monitoring interface we just created. (In my case, mon0).
MAC Spoofing Step-by-Step
As computer and network security professions, we should also be well aware of an attacker’s ability to spoof his MAC address. MAC addresses are vendor-specified identification numbers that all networking manufacturers put on their products. Each one is different. A MAC address is similar to a vehicle’s VIN number or a mobile phone’s IMEI number. If you know an attacker’s MAC address, you can determine what type of wireless antenna he is using.
However, if he’s done MAC spoofing, any logs that you manage to capture will only show the fake MAC address and not the real one.
As you can see, spoofing the MAC address prevents us from identifying the attacker. Just the type of thing a blackhat WiFi hacker would want to do.
Now that our adapter is in packet-injection mode, we should change our MAC address to cover our tracks. Security administrators and consultants take note. The bad guys have probably changed their MAC addresses.) The macchanger tool in Back Track and Kali Linux can change your adapter’s MAC address. But, if you run the commands in the images below, you will receive permission errors.
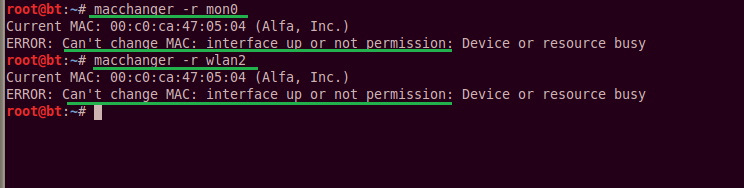
This is because wlan2 and mon0 are both active. We have turned them on earlier. In order to spoof their MAC addresses, we must disable them, run the macchanger command, then enable the adapters again. It’s very easy, just run the commands below:
(Of course, be sure to change the name of mon0 and wlan2 if yours is different).
ifconfig wlan2 downHit Enter. Then run:
macchanger -r wlan2When you hit Enter, your MAC address will change to a randomly generated MAC address and display it for you. You can now bring the wlan2 interface back up by running:
ifconfig wlan2 upYou can verify that the spoofed MAC address is active by running:
ifconfig wlan2Compare the Faked MAC: field that the tool generated matches the one listed in the ifconfig command. See the image below.
One strange thing I noticed was that if you change the MAC address of the physical network adapter, it will not actually change the MAC address of your virtual monitoring interface you created above. This means your real MAC address will leak through the monitoring interface. We can get around this by following the same steps to change wlan2’s MAC address. We will simply do the same set of commands on our virtual interface.
(Remember to change the name of your virtual interface if it’s different!)
ifconfig monO down
macchanger -r monO
ifconfig monO up
ifconfig monO
Be sure to verify that the MAC spoofing has worked on the virtual interface as well. And now you are finished, and ready to proceed to some of the other wireless security tutorials. Have fun!